Unlock Your Neck: 7 Essential Moves for Pain Relief and Mobility
At a Glance

Is that persistent ache in your neck making it hard to focus? Do you finish your workday with stiff, tight shoulders that feel like they're creeping up to your ears? You're not alone. In our modern world of screens and sitting, 'tech neck' has become a common complaint, leading to discomfort, headaches, and limited movement.
The good news is you don't have to live with it. Your neck is an incredibly complex and resilient structure, but it needs the right kind of care. It's not just about the neck itself; it's connected to your shoulders, upper back, and even your core. By focusing on a combination of gentle stretches and targeted strengthening, you can release tension, improve your posture, and reclaim freedom of movement.
This guide from Flouu is designed to be your first step toward a happier, healthier neck. We'll walk you through seven essential mobility exercises and yoga poses, from foundational movements to more challenging poses for when you're ready. Let's get started.
Chin Retractions
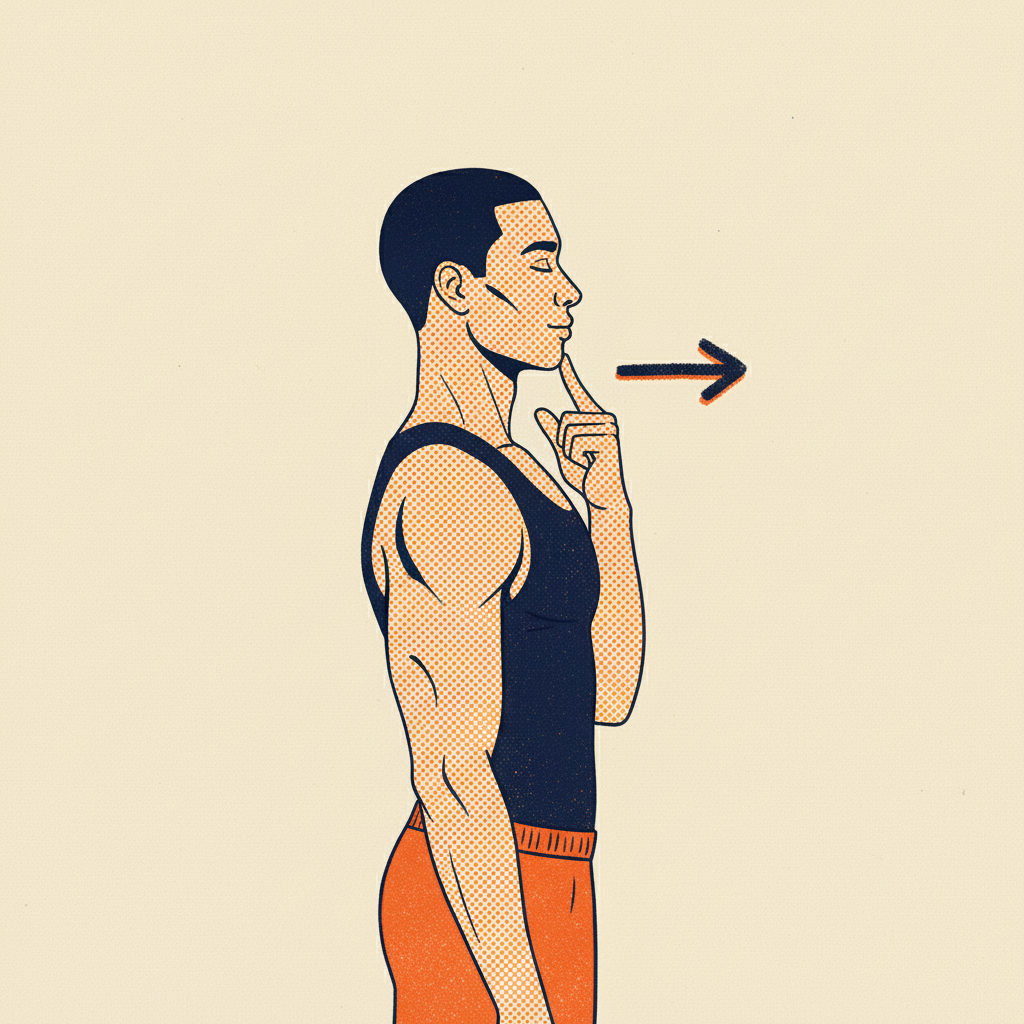
This is the ultimate exercise for correcting forward head posture. By strengthening the deep neck flexors and stretching the small muscles at the base of your skull, Chin Retractions help realign your head over your spine, reducing chronic strain and tension.
How to
- Sit or stand tall with your spine neutral and shoulders relaxed.
- Look straight ahead, keeping your jaw parallel to the floor.
- Without tilting your head, gently glide your chin and head straight back, as if you're trying to make a double chin.
- You should feel a stretch at the back of your neck, near the base of the skull.
- Hold for 3-5 seconds, then slowly release back to the starting position.
- Repeat 10-15 times.
Watch Out
Avoid tilting your chin down toward your chest. The movement should be a horizontal glide, not a nod. Also, be careful not to shrug your shoulders up toward your ears.
Chin Retractions
Tap to start practice
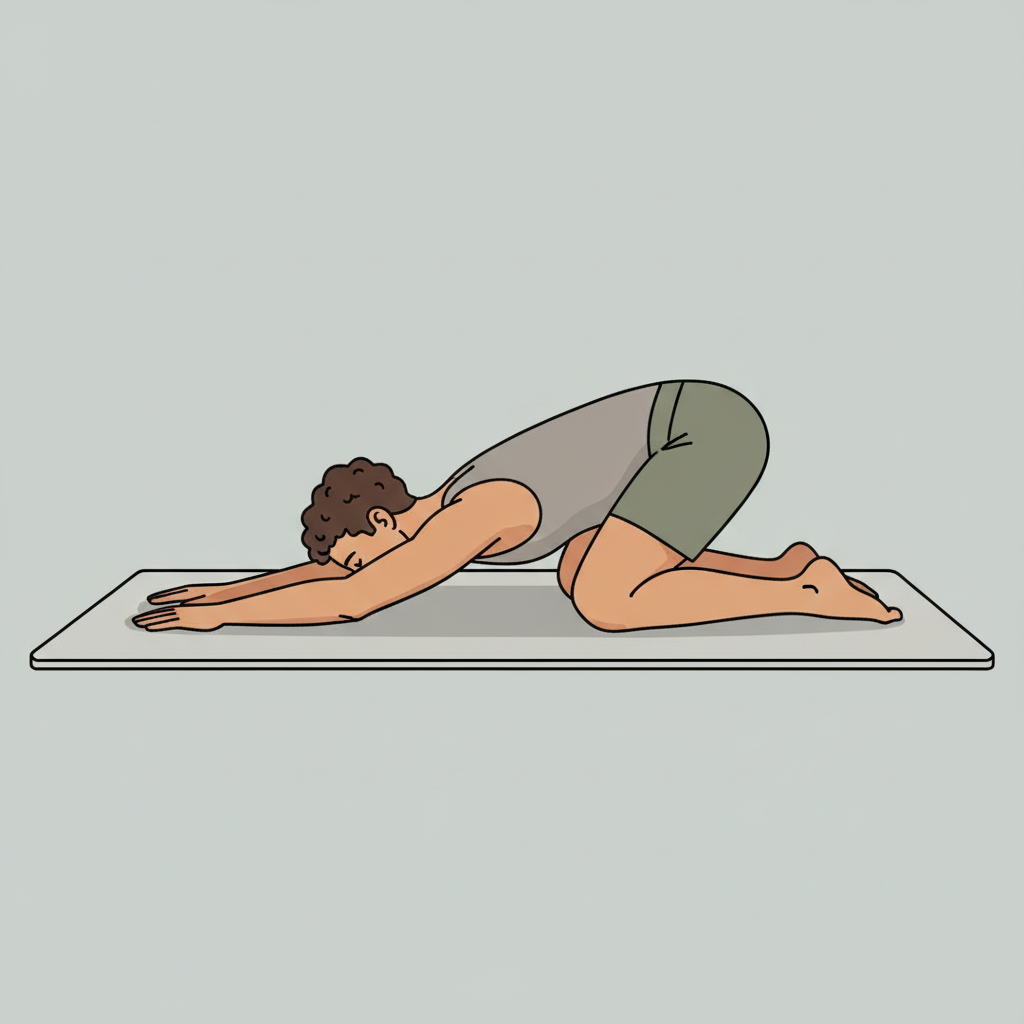
Locust Pose
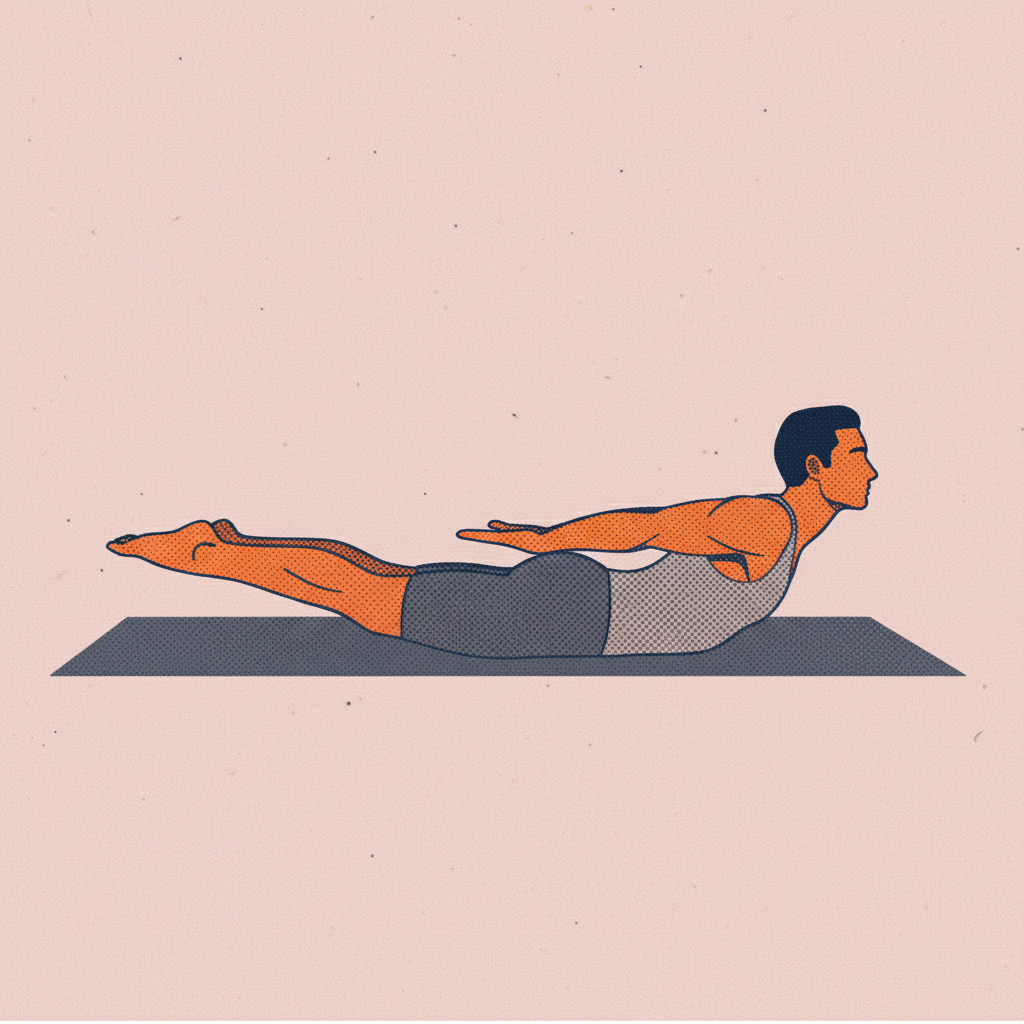
A healthy neck relies on a strong back for support. Locust Pose is a fantastic strengthener for the entire posterior chain—the muscles running along your backside, including your upper back, lower back, glutes, and the extensors of your neck. A stronger back improves posture and reduces the load on your neck muscles.
How to
- Lie on your stomach with your legs together and your arms alongside your body, palms facing up.
- Rest your forehead on the mat and take a deep breath in.
- As you exhale, lift your head, chest, arms, and legs off the floor.
- Keep your neck as a long extension of your spine. Gaze slightly forward and down, not straight ahead, to avoid compressing your neck.
- Reach actively through your fingertips and toes. Hold for 20-30 seconds.
- Exhale to gently release back down.
Watch Out
The most common mistake is cranking the head back to look forward, which creates compression in the cervical spine. Focus on length rather than height. Avoid using momentum; lift with control.
Locust Pose
Tap to start practice
Relieve Tech Neck in 5 Minutes
We turned this exact routine into an interactive session with guided timers and audio cues. No login required to start.
Supported Headstand
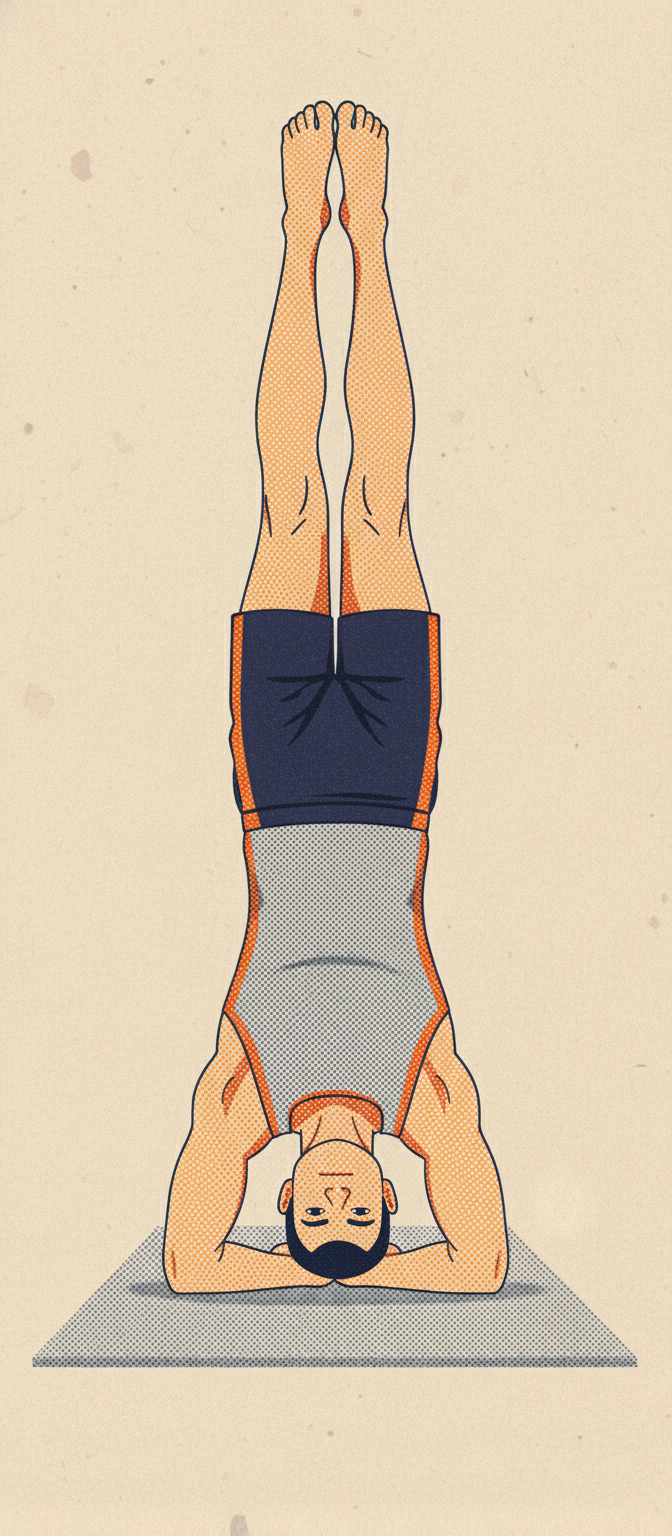
This is an advanced inversion that, when performed correctly, can build incredible strength in the shoulders, core, and deep neck stabilizer muscles. The key is to use your arms and shoulders to support your weight, creating traction and space in the neck rather than compression. Please approach with caution and respect for your body's limits.
How to
- Kneel on your mat. Interlace your fingers to create a firm 'basket' with your hands and place your forearms on the floor, elbows shoulder-width apart.
- Place the very top of your head (the crown) on the floor, cupping the back of your head with your hands.
- Press firmly down through your forearms to lift your shoulders away from your ears. This is the most important step.
- Walk your feet in towards your elbows, lifting your hips high.
- Engage your core and slowly lift your feet off the floor, either one at a time or together.
- Straighten your legs towards the ceiling, keeping your core and shoulders engaged.
Watch Out
Dumping your body weight onto your head and neck. The goal is for less than 20% of your weight to be on your head; the rest is in your arms. Avoid kicking up, as this can lead to injury. Keep your core engaged to prevent a 'banana back'.
Supported Headstand
Tap to start practice
Chin Stand
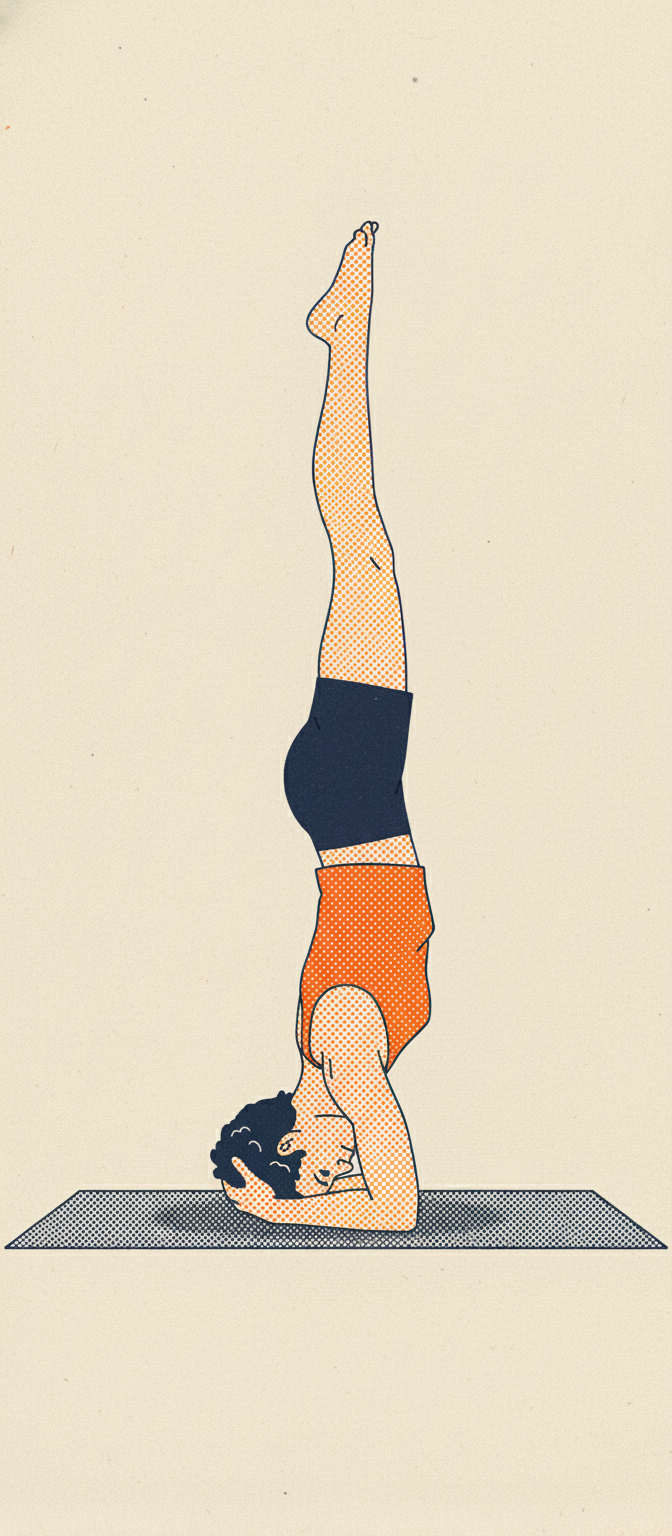
An advanced arm balance and backbend, Chin Stand strengthens the shoulders, arms, and back while providing a deep stretch for the neck and chest. This pose requires significant strength, control, and awareness. This is a peak pose and should only be attempted by experienced practitioners.
How to
- Start in a Four-Limbed Staff Pose (Chaturanga) with your hands under your shoulders.
- Keep your elbows tucked in as you lower your chest and chin to the floor, keeping your hips lifted.
- Walk your feet in slightly. Lift one leg high towards the ceiling.
- Bend your standing leg and take a small, controlled hop to lift the second leg up, finding balance on your hands and chin.
- Your weight should be distributed between your hands and your chest/chin, not solely on your neck.
Watch Out
Placing all the weight on the chin and neck, which is extremely dangerous. The primary support comes from the arms and chest. Avoid kicking up wildly. Lack of core and shoulder engagement will cause instability.
Chin Stand
Tap to start practice
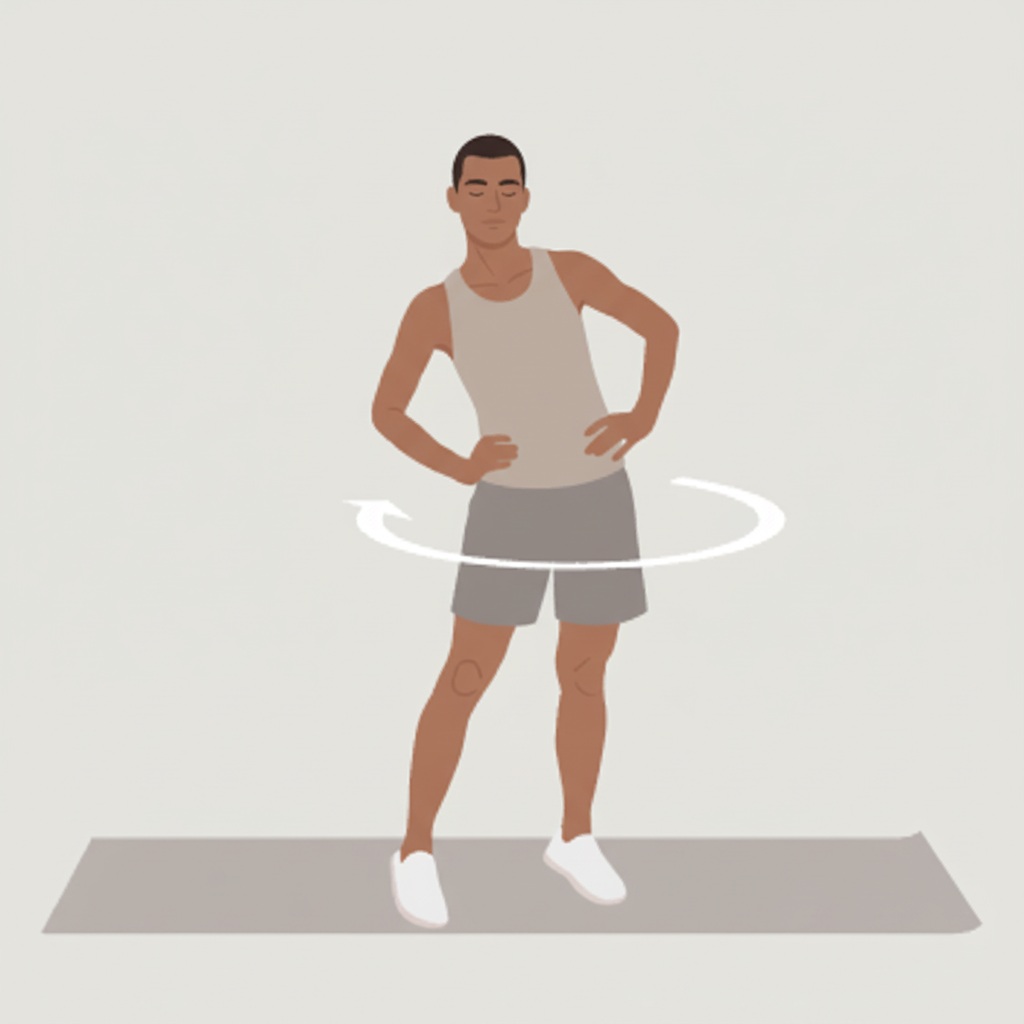
Neck Rotation
This is a fundamental mobility drill that safely increases your range of motion. It gently stretches the muscles on the side and back of your neck, like the sternocleidomastoid and trapezius, helping to relieve stiffness from holding your head in one position for too long.
How to
- Sit in a comfortable position with a long, tall spine. Relax your shoulders down and away from your ears.
- Inhale to lengthen your neck.
- As you exhale, slowly and gently turn your chin toward your right shoulder. Only go as far as feels comfortable.
- Hold for a full breath cycle (inhale and exhale).
- Inhale as you slowly return your head to the center.
- Exhale and repeat on the left side. Perform 5-10 rotations per side.
Watch Out
Moving too fast or using momentum. The movement should be slow and controlled. Avoid shrugging the shoulder you are turning toward up to meet your chin.
Neck Rotation
Tap to start practice
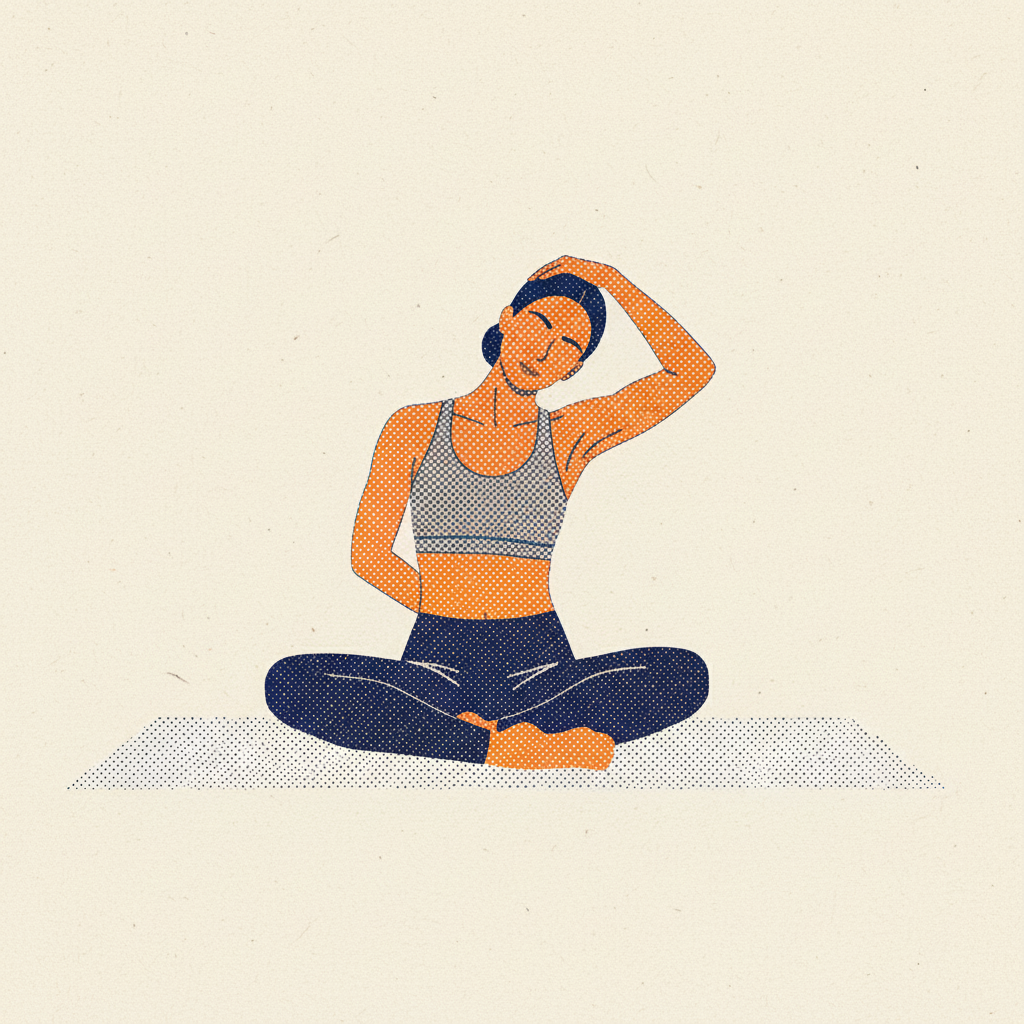
Ear-to-Shoulder
This classic stretch targets the upper trapezius and scalene muscles, which run from your neck to your shoulder. These muscles are notorious for holding tension, especially from stress or poor posture, and stretching them can provide immediate relief.
How to
- Sit tall with your shoulders relaxed.
- Inhale to lengthen your spine.
- As you exhale, gently lower your right ear toward your right shoulder. You are not trying to touch them; just let gravity do the work.
- Keep your left shoulder relaxed and heavy. To deepen the stretch, you can gently extend your left fingertips toward the floor.
- Hold for 30 seconds, breathing deeply into the left side of your neck.
- Inhale to slowly bring your head back to center and repeat on the other side.
Watch Out
Lifting your shoulder to meet your ear, which defeats the purpose of the stretch. Also, avoid pulling on your head with your hand, as this can overstretch the delicate muscles and ligaments. Let the weight of your head be enough.
Ear-to-Shoulder
Tap to start practice
Half Pigeon
You might wonder what a hip opener is doing in a neck routine. The body is a connected system! Tight hips can contribute to lower back tension, which in turn affects your upper back and neck posture. In its upright variation, Half Pigeon also opens the chest and shoulders, counteracting the slump that leads to neck pain.
How to
- Start in a Downward-Facing Dog. Bring your right knee forward and place it on the mat behind your right wrist. Your right shin can be angled back toward your left hip.
- Extend your left leg straight back behind you, with the top of the foot on the floor.
- Square your hips toward the front of the mat. Press through your fingertips to lift your chest and lengthen your spine, drawing your shoulders back and down.
- Hold here, or fold forward over your front leg for a deeper hip stretch.
- Breathe into the stretch for 30-60 seconds before switching sides.
Watch Out
Collapsing all your weight onto the hip of the bent leg. Keep your hips level. Avoid tensing your shoulders and jaw, especially if you fold forward.
Half Pigeon
Tap to start practice
Your personal flow awaits.
Experience a fully personalized AI yoga session tailored to your body and goals. Just tell Flouu what you need.